HVAC gauges are one of the most important tools in the trade. Whether you are working on residential air conditioners, heat pumps, walk-in coolers, or automotive A/C systems, manifold gauge sets help you diagnose, charge, and maintain systems that contain refrigerant. You will rarely see a professional HVAC technician on a job without a set of gauges in their tool bag.
Many of the fundamentals behind gauge work, such as understanding pressure, saturation temperature, superheat, and subcooling, are core skills taught in a structured HVAC Technician Training Program. Learning how to handle refrigerants safely and read gauges correctly during training makes real-world service work much easier once you are in the field.
In this guide, you will learn what HVAC gauges do, the difference between analog and digital sets, how to connect and read them correctly, and why proper certification is essential when working with refrigerants.
Key Summary
- HVAC manifold gauges are used to check system pressures, charge refrigerant, recover refrigerant, and troubleshoot performance issues.
- The blue hose connects to the low-pressure suction side, the red hose to the high-pressure discharge side, and the yellow hose is used for charging or recovery.
- Before connecting gauges, technicians should inspect hoses, replace worn gaskets, and close all valves on the manifold.
- Systems must be allowed to run and stabilize before taking suction and discharge readings.
- Gauge readings should always be compared to manufacturer specifications and pressure temperature charts for the specific refrigerant in use.
- Safe disconnection with low-loss fittings helps reduce refrigerant release and protect the environment.
- Technicians who work with regulated refrigerants should follow EPA rules, manufacturer charging charts, and current safety standards to keep systems efficient and compliant over time.
Why Gauges Matter in HVAC
Manifold gauges, often called HVAC gauges, allow technicians to “see” what is happening inside a refrigeration circuit. By measuring system pressures, you can:
- Verify correct refrigerant charge
- Diagnose low or high superheat and subcooling
- Identify restrictions, non-condensables, or airflow problems
- Detect potential leaks or mechanical issues
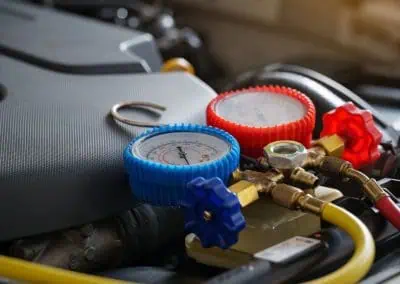
A typical manifold gauge set includes:
- Low-pressure valve (blue)
- High-pressure valve (red)
- Low-pressure gauge (blue dial)
- High-pressure gauge (red dial)
- Low-pressure hose (blue)
- High-pressure hose (red)
- Center hose (yellow, for charging or recovery)
- Manifold body with ports and valves
The manifold is the central block where the hoses, valves, and gauges all connect. From here, you can attach a vacuum pump, recovery machine, or refrigerant cylinder. Before connecting to any system, make sure:
- All manifold valves are fully closed
- Hoses are in good condition and properly rated
- Gaskets and seals are not cracked or leaking
Different gauges and scale markings apply to different refrigerants. Most equipment nameplates identify the refrigerant used, such as R-410A, R-32, or R-454B. Always confirm that your gauge set is compatible with the refrigerant you are working on.
As equipment evolves, more systems now use low GWP refrigerants labeled A2L or A3 under ASHRAE safety classifications. These mildly or highly flammable refrigerants have specific charge limits, ventilation requirements, and leak response procedures. Technicians who work on A2L and A3 systems benefit from completing an A2L Refrigerant Certification course that explains how these safety rules affect everyday gauge work, charging methods, and service practices.
Types of HVAC Gauges: Analog vs Digital
HVAC manifold gauges come in two main styles: analog and digital. Both can be accurate and useful if used correctly, and they are core skills taught in an HVAC School.
Analog Gauges
Analog gauges have been the industry standard for decades. They are:
- Durable and relatively inexpensive
- Good for teaching technicians how to read pressure and saturation temperature scales
- Less dependent on electronics or batteries
However, analog gauges require manual calculation of superheat and subcooling using separate temperature readings and pressure–temperature charts. This increases the risk of human error, especially for newer technicians.
Digital Gauges
Digital manifold sets are more advanced and typically more expensive. They often:
- Display pressure, saturation temperature, superheat, and subcooling automatically
- Support multiple refrigerants in one device
- Provide data logging or wireless connectivity in some models
The tradeoff is that digital gauges have more electronic components that can fail and may not be as rugged as analog models in harsh environments.
Regardless of which style you use, always:
- Verify calibration regularly
- Replace worn gaskets to prevent leaks
- Store your gauges in a protective case when not in use
Are Analog or Digital HVAC Gauges Better for Beginners?
Both analog and digital HVAC gauges can be used effectively by beginners, but they teach slightly different skills.
Analog gauges are useful for new technicians who want to really understand the relationship between pressure, temperature, superheat, and subcooling. Reading the dials, using a pressure temperature chart, and doing the math manually helps build a strong technical foundation. The tradeoff is that analog gauges leave more room for human error if you misread the scale or make a calculation mistake.
Digital gauges simplify much of that work by calculating superheat and subcooling automatically. This can save time in the field and reduce mistakes, especially for new technicians who are still building confidence. However, beginners should still learn how the readings are derived, not just rely on the screen.
The best approach for someone starting out is to become comfortable with analog gauges first, then transition to digital as their skills grow. That way, you understand what the tool is doing for you, rather than letting it think for you.
Step-by-Step: How to Use HVAC Gauges Properly
Below is a simplified step-by-step process for using HVAC manifold gauges on a typical air conditioning or refrigeration system. Only trained and certified technicians should connect gauges to live systems that contain regulated refrigerants.
Below is a simplified step by step process for using HVAC manifold gauges on a typical air conditioning or refrigeration system. Only trained and certified technicians should connect gauges to live systems that contain regulated refrigerants.
Technicians should complete EPA 608 Certification for stationary refrigeration and air conditioning systems. Those who work on motor vehicle A/C should also earn EPA 609 Certification, so they understand safe recovery, proper charging, and the federal rules that apply when using gauges on systems with regulated refrigerants.
Step 1: Inspect and Prepare the Gauges
Before connecting to any system:
- Check that gauges and hoses are intact, without cracks, kinks, or cuts
- Replace worn or flattened gaskets at hose ends
- Make sure all manifold valves are fully closed
- If available, install low-loss fittings or check valves to reduce refrigerant loss during connection and disconnection
Step 2: Connect the Gauges
- Turn off power to the air conditioning or refrigeration system at the disconnect or breaker.
- Attach hoses to the service ports:
- Blue hose: low-pressure suction service port
- Red hose: high-pressure discharge or liquid service port
- Yellow hose: vacuum pump, recovery unit, or refrigerant cylinder, depending on the task
- Open the service port Schrader valves gently, if present.
- Crack the hose connection slightly at the manifold to bleed a small amount of refrigerant and remove air from the hoses before fully tightening (purging the line).
Step 3: Stabilize the System
- Restore power to the system.
- Allow the system to run for several minutes.
- Wait until pressures stabilize and indoor and outdoor conditions are reasonably steady.
Stabilization is important, because connecting gauges too early or reading pressures while the system is ramping up can lead to misleading values.
Step 4: Take Pressure Readings
Once the system has stabilized:
- Read suction pressure on the blue gauge.
- Read discharge or liquid pressure on the red gauge.
Compare these readings to the manufacturer’s specifications and to a pressure–temperature chart for the refrigerant in use. For example, a residential R-410A system may have typical operating pressures that fall within a range based on outdoor ambient temperature, indoor load, and equipment design.
From these pressure readings, you can determine:
- Saturation temperature in the evaporator (from suction pressure)
- Saturation temperature in the condenser (from discharge or liquid pressure)
Combined with temperature readings at the suction and liquid lines, you can calculate superheat and subcooling if your gauges do not do this automatically.
Step 5: Diagnose and Adjust
With accurate readings, you can start diagnosing system performance:
- If suction pressure is too low
- Possible undercharge
- Restricted airflow across the evaporator
- Metering device restriction
- If suction pressure is too high
- Overcharge
- Returning liquid to the compressor
- Incorrect indoor airflow or oversizing
- If discharge pressure is too high
- Dirty or blocked condenser coil
- Overcharge
- Outdoor airflow issues
- If discharge pressure is too low
- Undercharge
- Weak compressor
- Low outdoor ambient conditions
Any charging or recovery procedure should follow manufacturer instructions and legal requirements. Always add or recover refrigerant slowly and verify conditions repeatedly instead of relying on a single snapshot.
Step 6: Disconnect Safely
When you are finished:
- Turn off power to the system.
- Close all valves on the manifold.
- Allow pressures in the hoses to equalize as needed.
- Disconnect hoses from the service ports carefully.
- Use low-loss fittings to minimize refrigerant release to the atmosphere.
- Replace service port caps and ensure they are tight and in good condition.
- Store your gauges and hoses in a clean, dry location away from extreme temperatures.
Hose Color Guide
Most manifold gauge sets follow a standard color scheme. This helps technicians connect quickly and consistently without mistakes.
| Hose Color | Connection | Function |
|---|---|---|
| Blue | Low-pressure side (suction line) | Measures suction or low side pressure |
| Red | High-pressure side (discharge line) | Measures discharge or high side pressure |
| Yellow | Center or manifold port | Adds or recovers refrigerant, or pulls vacuum |
| Black (if present) | Dedicated vacuum port | Connects to vacuum pump or reclaim unit |
Knowing these assignments is essential for reading gauges correctly and avoiding reversed connections that could lead to incorrect diagnosis or damage.
How Often Should HVAC Gauges Be Calibrated?
HVAC gauges should be calibrated on a regular schedule to keep readings accurate and reliable. For most technicians, calibrating gauges at least once a year is a good baseline. If you use your gauges heavily during peak seasons, work on critical systems, or notice readings that do not match system performance, you should calibrate them more often.
Digital manifold gauges may need more frequent calibration than analog sets, especially if they are exposed to drops, moisture, or extreme temperatures. Always follow the calibration recommendations in the manufacturer’s manual, and replace worn hoses, gaskets, and seals as part of your routine maintenance. Consistent calibration ensures your superheat, subcooling, and pressure readings are trustworthy, which directly affects system efficiency, charge accuracy, and diagnostic success.
Why Certification Matters for Using Gauges
Using manifold gauges on a live system is not just another technical step, it is a safety and compliance responsibility. Refrigerants can cause frostbite, displace oxygen, and damage equipment if they are mishandled. Improper recovery or venting also harms the environment and can lead to fines under federal regulations.
Because of this, technicians who work with regulated refrigerants are expected to understand safe recovery, leak prevention, proper charging, and the recordkeeping rules that apply to their work. In the United States, that foundation comes from credentials like EPA 608 Certification for stationary systems, EPA 609 Certification for motor vehicle A/C, and dedicated training for low GWP A2L refrigerants as they become more common in modern equipment.
Good training does more than show you where to hook up the hoses. It teaches how pressure, temperature, superheat, and subcooling relate to each other, how different refrigerants behave, and how to use gauges without releasing charge or stressing components. When technicians combine that knowledge with regular gauge calibration and careful service habits, they can diagnose systems accurately and protect both equipment and the environment.
For anyone starting out or leveling up in the trade, learning gauge work in a structured program is one of the fastest ways to build confidence in the field. The Training Center is an accredited HVAC School in New Jersey with in-person and online programs that teach manifold use, refrigerant safety, and system diagnostics, so students learn the skills needed to work on real systems safely and effectively.